Among all the other wood pallet projects, I guess the pallet wooden flooring is something that could be rated as the most charming and effect creating project. In it the wood is all around you and the shade of the wood really gives a very mesmerizing and executive touch to your premises. So here in this project we are going to discuss some basic methods involved in pallet outdoor flooring. So before we get started, count on all of your required supplies like pallets, basic wood work tools like miter saw, manual cutter or saw, sander, nail gun, glue gun, measurement tools and some precautionary measuring accessories like gloves and goggles etc.
Once you are done with all the needed supplies, prepare the ground where you have to apply the wooden flooring or the wood pallet flooring. Make the uneven surface even by filling with some clay and level it perfectly.
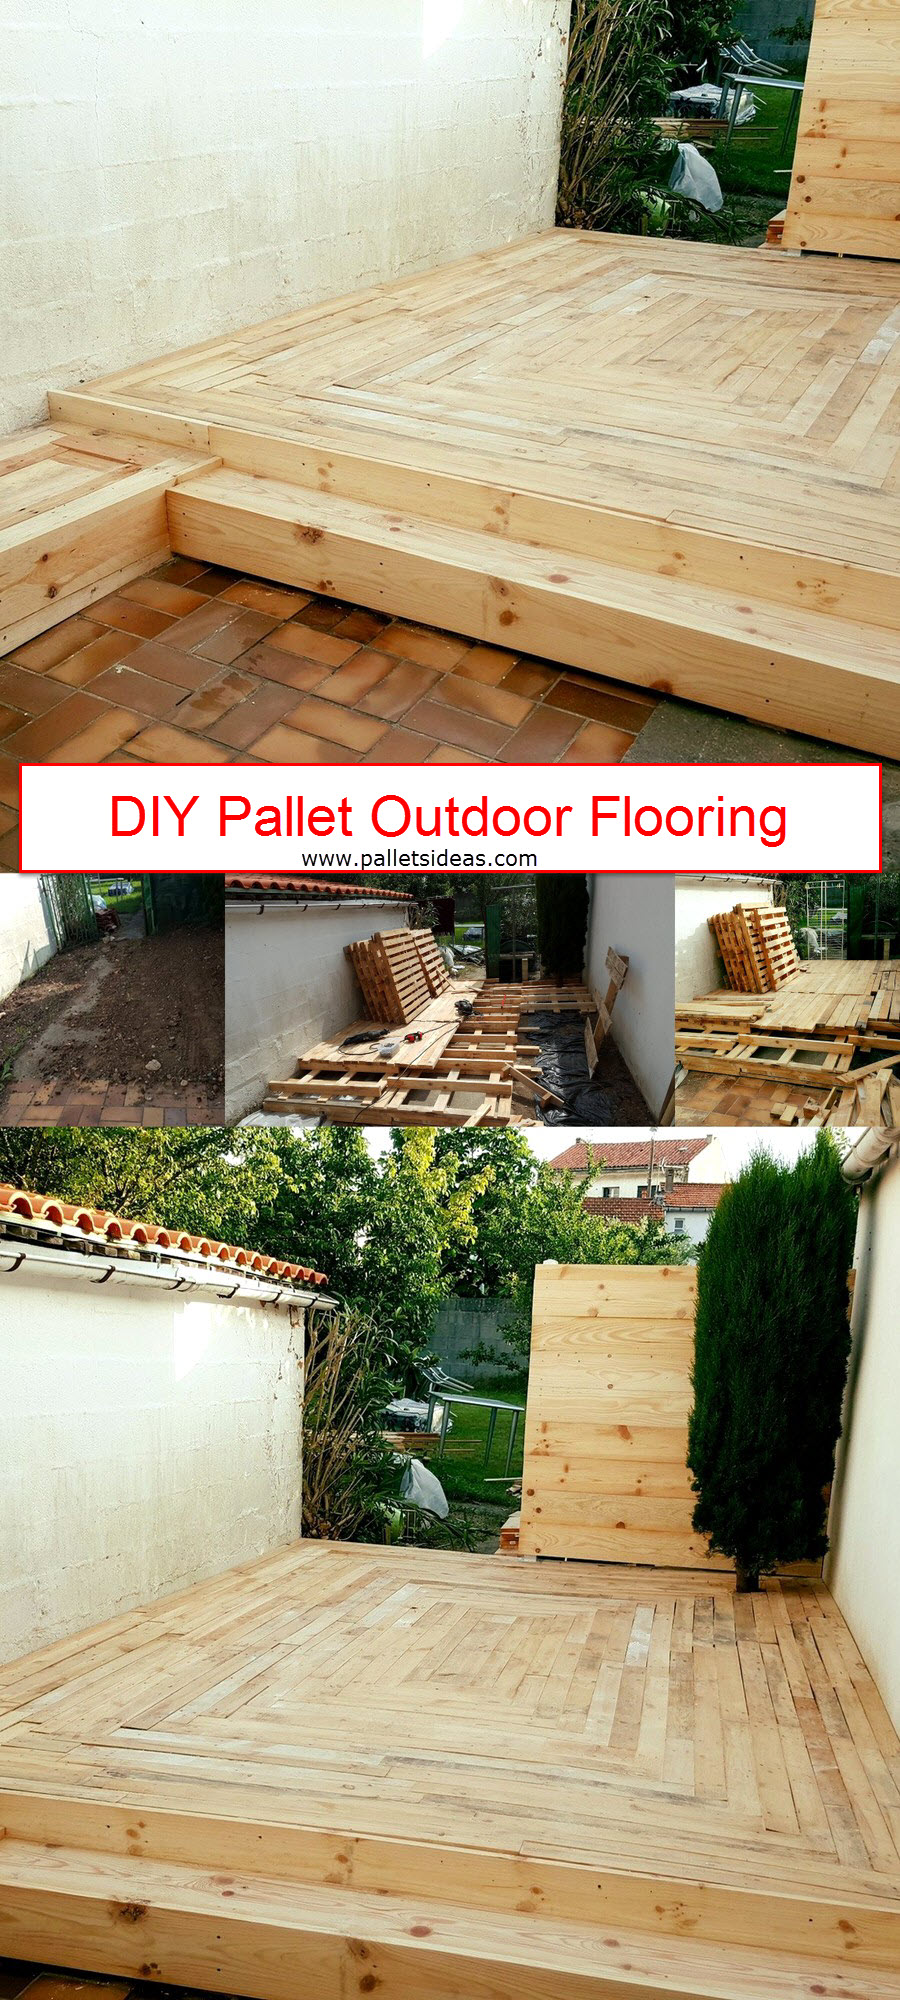
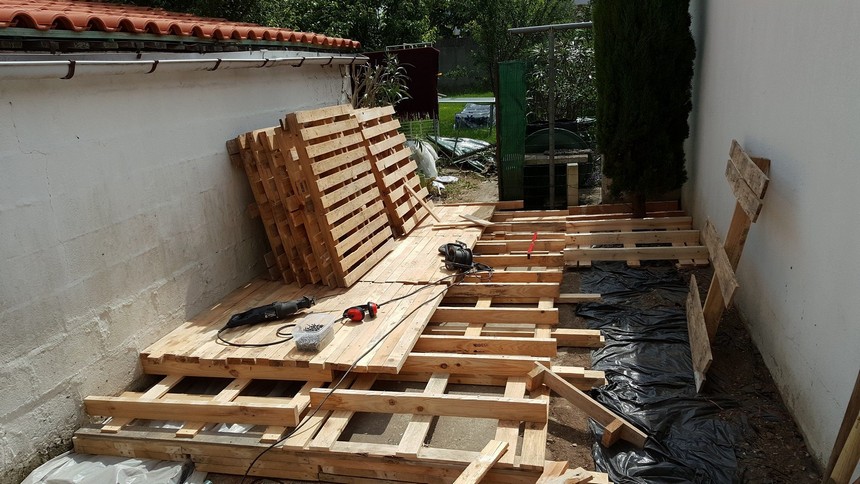
Now the basic step of the wood pallet that is certainly known to all who do these wood pallet projects frequently. Dismantle the whole pallets by turning them into individual isolated wood pallet planks. Leave the middle plank attached on each pallet, and place them together following the pattern shown here. This would actually become the base of your project.
Now start filling all the empty spaces with the cut to size shipping wood pallet planks. One thing must be kept in mind that in this specific project you have to be extra conscious in the matter of measurements because here the smallest measure would count.
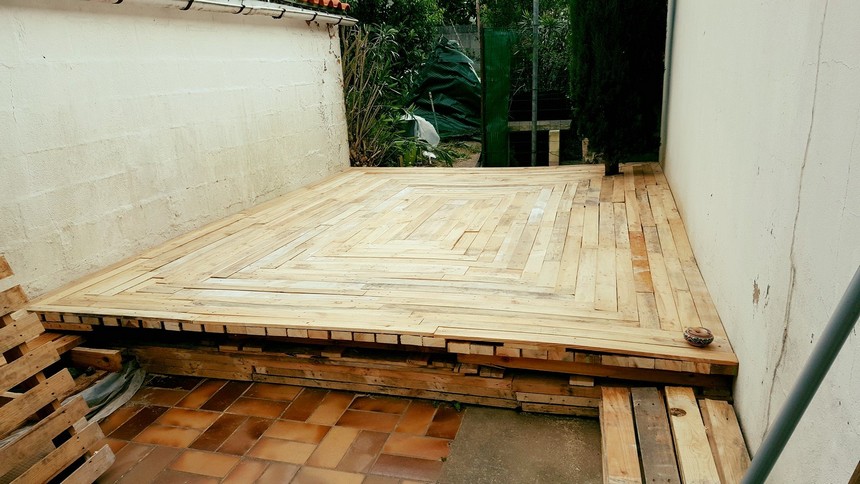
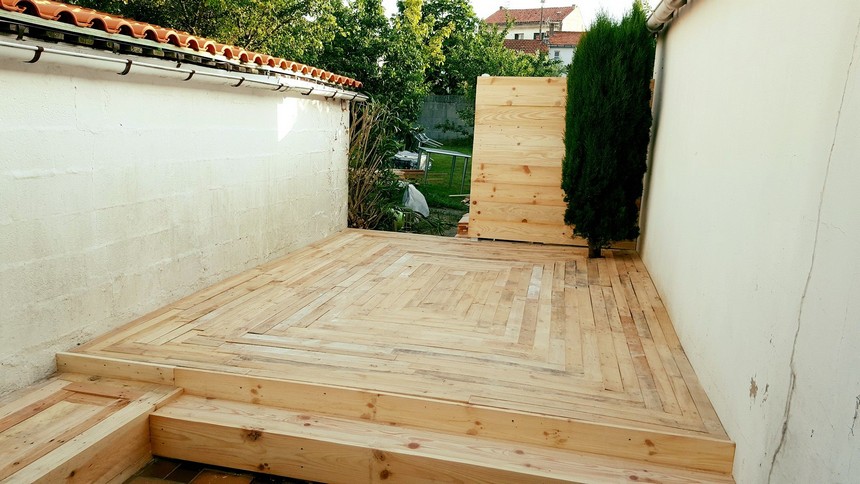
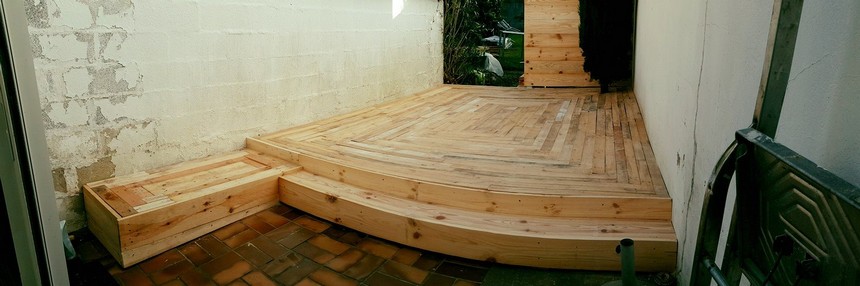
Do not fix all the wood pallet planks in one direction, fix some of them lengthwise and some widthwise, this would create a very beautiful pattern that would look perfectly awesome on the ground. As you can clearly see here in the actual demonstration.
As we had to make it multi tiered, so the first filling was made horizontally while the second one is made vertically. While attaching these shipping pallet planks you would be having a couple of options from where you have to pick that suits you best.
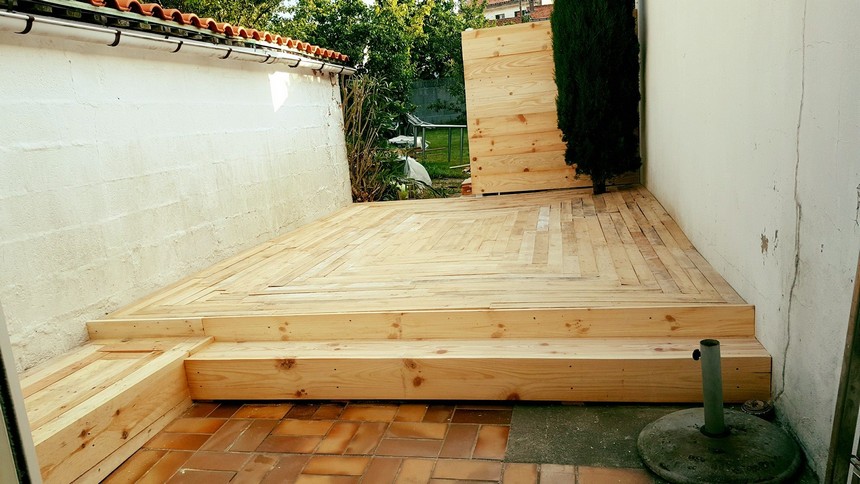
Your final project would look something like this. Just look at the fineness, all of this isn’t because of the quality and the cleanliness of the shipping pallets, but our tireless sanding of each attached plank has also escalated the outlook of the project. So credit goes to the crafters actually.
While fixing the pallet wood planks, it is better to first apply a thin layer of glue on the plank exactly at the spot that is going to be connected with the other one, and then use the nail gun to further ensure the strength of the fixed wood pallet plank.
It would be great if you don’t apply any staining on the whole floor, infact this would be the real impressive impact that is expected from the wood. Just do a lot of sanding on the wood planks, this would even enhance their outlook and the beauty, also take all the protective measures while the whole project.
Created & Shared by: Design palettes